Ah, my first post…finally. This website should take to the skies now. My SEO plugin is prompting me for the last year and a half that all the pages on my website are missing text, and content to be particular. So here I am adding my first textual content to my site so that it “ranks” better.
As the title of this post suggests it’s the cliche topic, again. Be it in any artistic profession the better you are with your techniques and skills the better your outcome would be irrespective of the tools you used to deliver the outcome. To quote Biz Stone, “Even the simplest tools can empower people to do great things”. Do you think if you handed a smartphone camera to Ansel Adams (assuming he was still alive today) he would have taken any worse photos as compared to an amateur with a state of the art high-end DSLR? (or mirrorless 😉 ). But just to set the record straight, I hate taking photos via a smartphone camera (the reasons are a separate post altogether and for another day).
Focussing on techniques more and not on tools will also help you alleviate your GAS problems. Not the one related to your stomach or your car but to your camera gear. Also known as Gear Acquisition Syndrome it’s the all-time feeling of getting/buying all the latest and greatest gear that money can buy (or sometimes not). If you own a dual-camera 20 MP phone you would be in FOMO of buying the next best camera phone, maybe the quad-camera 48 MP Ultrawide. It’s a similar story if you have an entry-level DSLR and you want to upgrade to a full-frame even though the photos are coming out great. I know I too had a little bit of this syndrome when I bought my second camera (Nikon D750), second hand, phew… The product shots are available on my Studios page. At the end keep in mind that photography is one of the most expensive addictions you can have.
Now let’s get to the crux of the matter. If I should not focus on the tools then what techniques should I focus on? Let me help you with that. The following are the building blocks of rules that help you become better at taking photos. And the best part is you can test these out with both a smartphone and/or a full-fledged camera. These techniques are mostly explained from a landscape photographer’s point of view but it works in any situation.
Fill the frame with what you like
It’s mostly correct to assume that you are taking a photo of something or someone (unless you want to go the abstract art route). Next time try taking the photo by getting closer to the subject or using a zoom lens or if both are not possible then cropping the photo in post-production (aka editing in common parlance). Take the example of the two shots below.


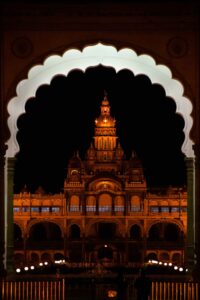
Use Natural Framing
When taking photos try the frame the subject within a natural frame like a window or an arch. You can find examples in my shots of the Mysore Palace and Hampi on the Architecture page.

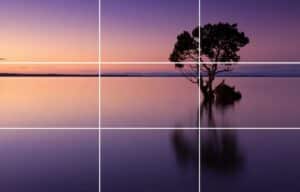
Rule of Thirds
This is something which you would have heard a hundred times if you are even a little bit into photography. It simply says to place the main subject of the photo on any of the four intersection points of the horizontal and vertical lines that form when you divide the frame into three equal halves. Find similar patterns in the photos in my Landscape section.
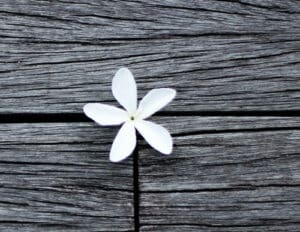

Symmetry
Find repeating patterns or reflections. Reflections are easier to photograph since the top half of the image would be the true reflection of the second half or vice versa. Works for right and left symmetry too.
Connect the Dots – Leading lines
Find natural lines that lead the viewer’s eyes through the photo. It could be a natural line like a stream or a river or artificial like a railing or wall. In the above photo, you can see natural leading lines of the side corridors leading you to the three arch openings in the centre.
Perspective is everything
Take the shot from all angles. Go left, go right, go top, go bottom. Go diagonal, if possible.


Lighting is Everything
My Landscape photos should give you an idea of why I chase sunsets and sunrises.

Try Vertical
Yes, landscape photos do not mean you have to take them in landscape orientation only. Trying vertical helps to get a different perspective and also for TikTok 😉

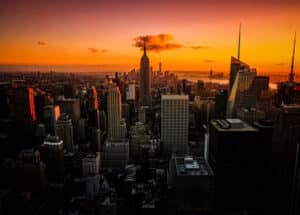
Try Zoom (lens)
It’s not always necessary to take the entire expanse of the landscape into the photo. You can try picking out small but significant aspects of the view and zooming into them.

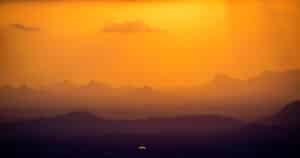
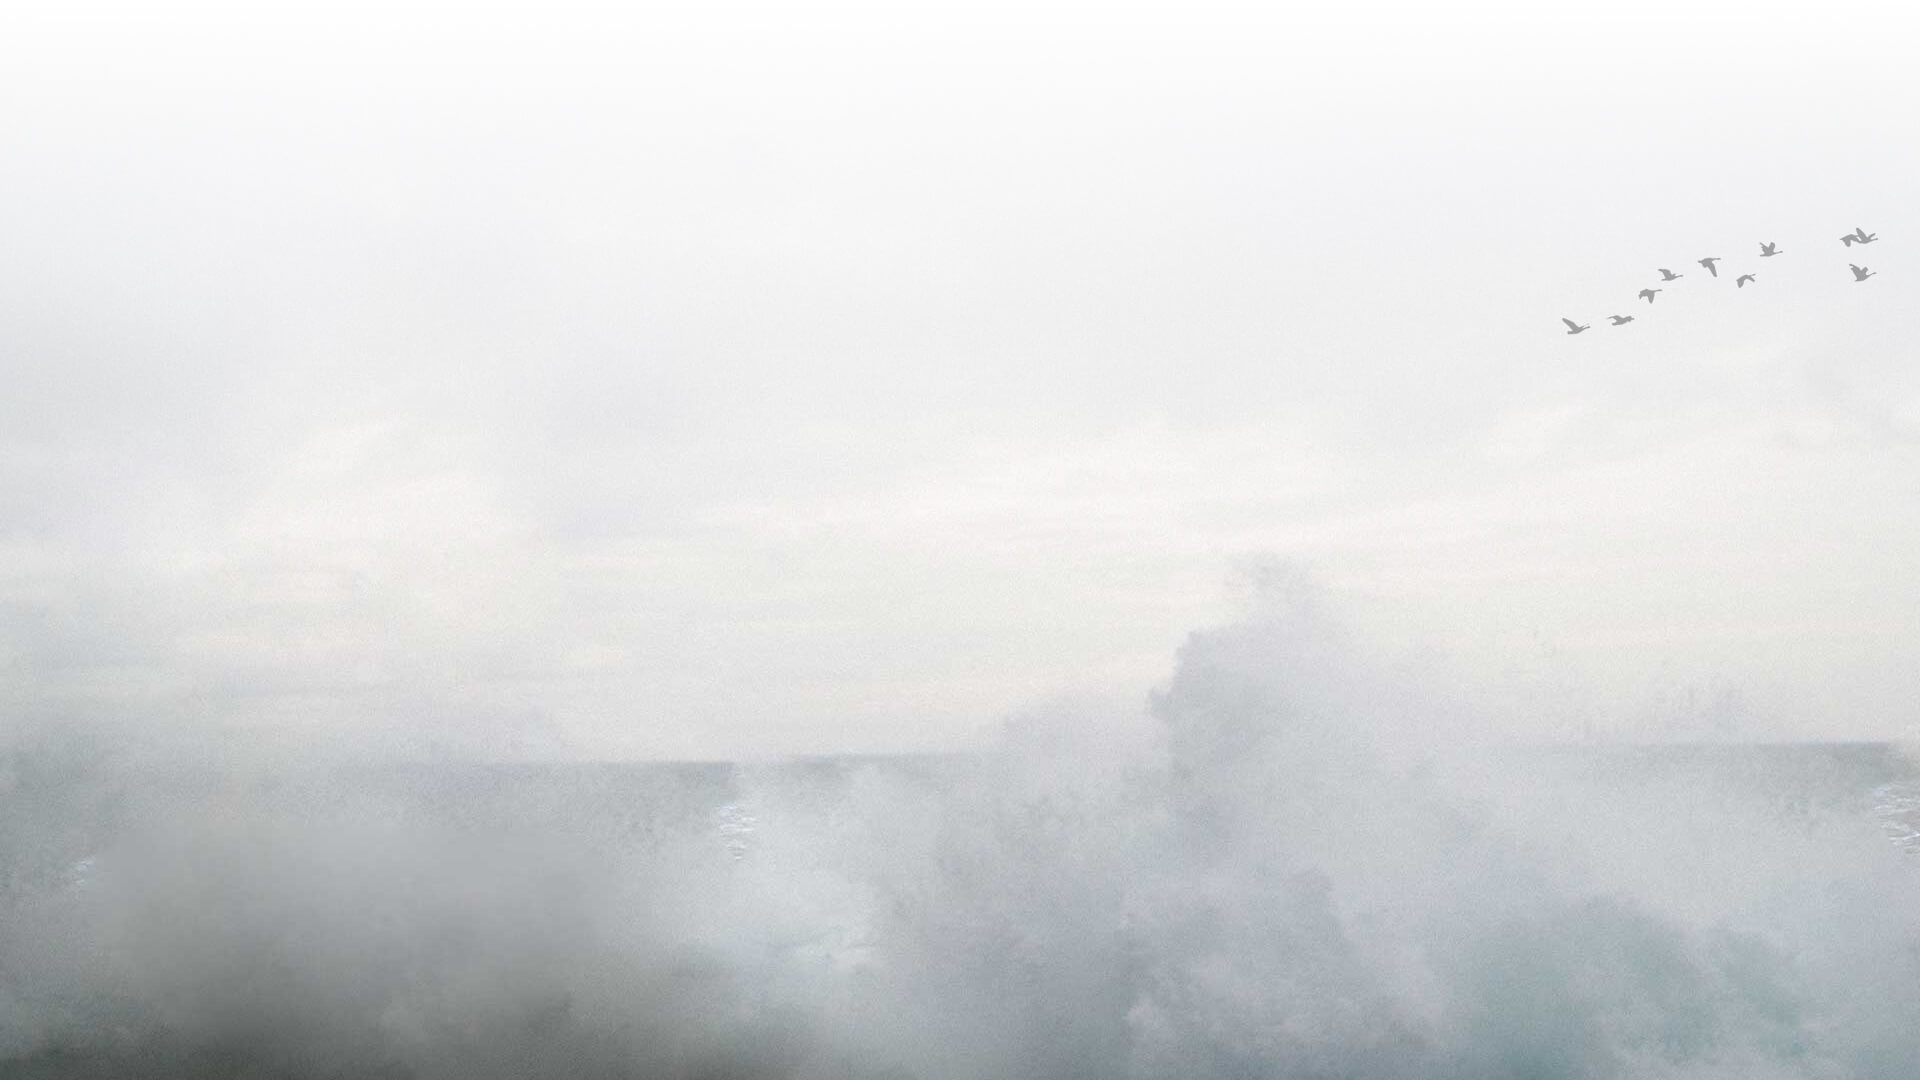
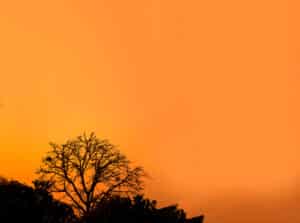
Negative space
This one sometimes contradicts the fill the frame rule but negative space signifies there is no visual element present in the specific area of the photo. It allows the viewer’s eyes to wander around the frame instead of focussing on the subject.
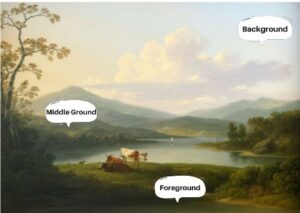
Foreground Middleground Background
A photo (mostly a landscape photo should have three distinct elements a foreground which is the nearest element to the lens, the background which is the farthest and the middle ground which most of the time (but not all) forms the subject of the image. This gives depth to the photograph and lets the viewer’s eyes meander through the photo.
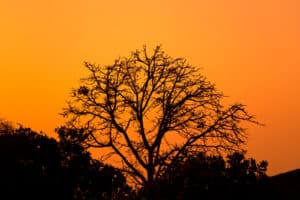
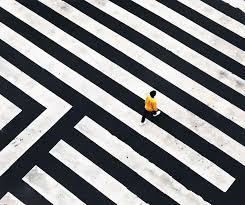
Use Shapes
Strong shapes especially lines, triangles and spirals give a strong aesthetic feeling to the photograph.
These techniques or rules are in no way exhaustive and at the end of the day rules are meant to be broken.